
ECE Movement Curriculum · Preschool & Kindergarten

13 Parachute Games for Preschoolers: Cooperative Gross Motor Play

Explore 13 illustrated play-parachute activities for shared lifting, lowering, walking, ball play, turn-taking, and group movement. Each activity includes teacher notes and modern safety adaptations where the archival diagram needs additional caution.

ADVERTISEMENT

Essential Play Parachute Safety & Setup

Use these management principles before choosing any of the activities below.

Developmental Readiness

Preschool & Kindergarten. Start with simple holding, lifting, lowering, walking, and gentle ripple games before adding faster changes or under-canopy movement.

Manufacturer-Approved Grip

Use designated handles or the reinforced edge exactly as instructed. Never wrap straps or fabric around fingers, wrists, or the body.

Clear Perimeter

Open the parachute fully before play and maintain the clearance required for the planned activity, away from walls, furniture, door swings, fans, lights, branches, and other groups.

Clear Group Cues

Use simple shared cues such as 'ready, lift, lower, stop' so children know when to move and when to pause. Do not prioritize height or speed over control.

13 Illustrated Activities

Preschool Parachute Activity Cards

Each activity includes a short instruction, setup notes, safety guidance, teacher cues, and ways to simplify or extend the play. Follow the actual parachute manufacturer's instructions whenever they differ from an archival example.
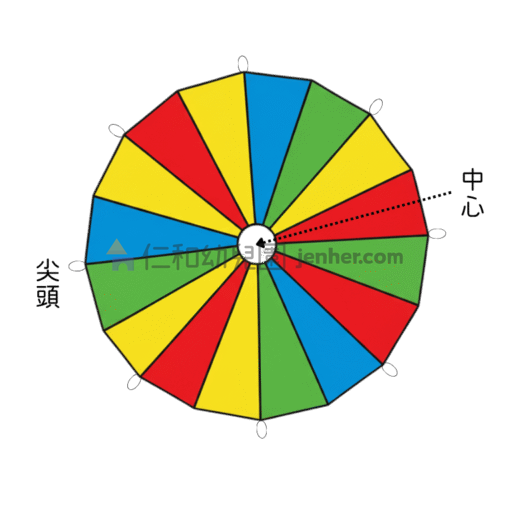
Activity 21-1: identifying play parachute parts and practicing safe handling

Parachute Parts & Safe Handling

Explore the parts of your play parachute, identify each child's designated handle or reinforced edge position, and practice the grip described in the product instructions.

Teacher Notes: Setup, Safety & Variations
Equipment: 1 age-appropriate play parachute with intact handles or reinforced edge
Setup: Spread the parachute flat in a clear activity area and give each child a designated holding position.
Safety: Follow the specific manufacturer's grip and age guidance. Never wrap straps, fabric, or handles around fingers, wrists, or the body, and do not walk or run across the parachute fabric unless the product explicitly allows it.
Make It Easier: Practice holding the designated handle or edge while seated and respond to simple 'hold' and 'let go' cues.
Make It Harder: Practice a small lift and lower on the teacher's cue while keeping the same safe grip and personal position.
Teacher Cue: "Find your own handle or edge spot—ready, hold, lift a little, lower, and stop."
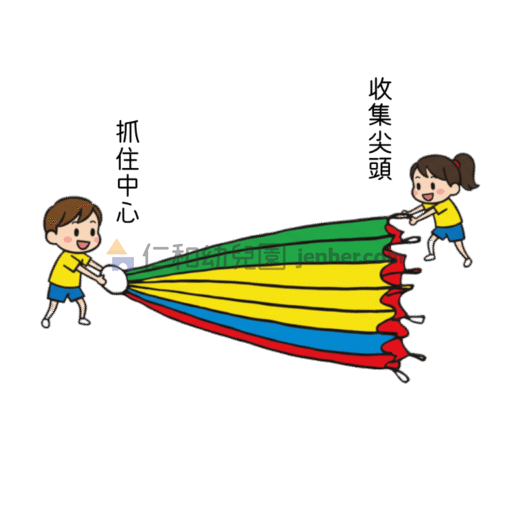
Activity 21-2: Group Folding & Deflation

Group Folding & Deflation

Work together to let the air settle, then follow the teacher's directions to fold the parachute neatly for storage.

Teacher Notes: Setup, Safety & Variations
Equipment: 1 play parachute
Setup: Keep the floor around the parachute clear while the group prepares to fold it.
Safety: Before anyone steps backward or toward the center, check that the path is clear and move only on the teacher's cue.
Make It Easier: Adults hold the main edges while children help smooth a small section of fabric.
Make It Harder: Have small groups help align the edges before adults complete the final fold or roll.
Teacher Cue: "Let the parachute rest, check your space, and fold together slowly."
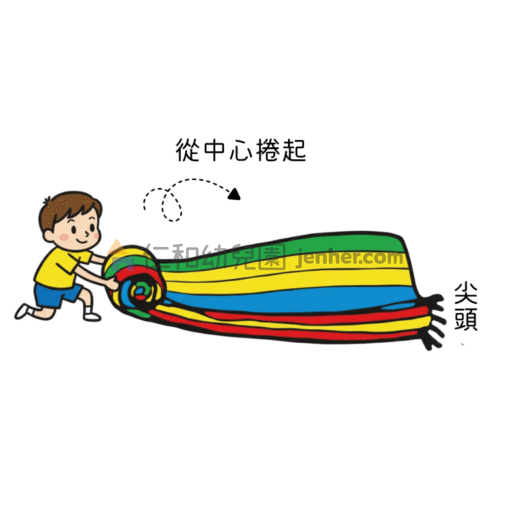
Activity 21-3: Parachute Rolling & Storage Routine

Parachute Rolling & Storage Routine

Help smooth and roll the folded parachute according to the product's storage instructions, then place it in its bag or storage area.

Teacher Notes: Setup, Safety & Variations
Equipment: 1 folded parachute and its manufacturer-provided storage bag or strap, if included
Setup: Use a clean, open floor area with children positioned along the sides rather than on top of the fabric.
Safety: Use gentle hand pressure and keep fingers clear of buckles, tightening straps, and other pinch points. Adults handle hardware that is not intended for children.
Make It Easier: Children help smooth wrinkles while adults do the rolling.
Make It Harder: Children take turns helping roll one section at a time while the teacher keeps the edges aligned.
Teacher Cue: "Smooth, roll, and pass the job along—slow hands help take care of our parachute."
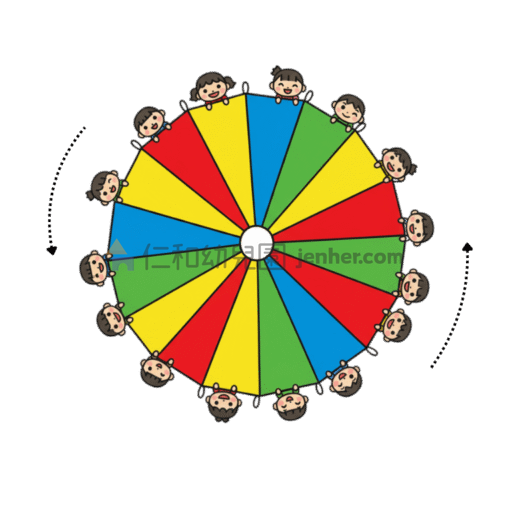
Activity 21-4: Carousel Circle Walk

Carousel Circle Walk

Hold your designated handle or edge position and walk together around the circle at a comfortable pace, stopping when the teacher gives the stop cue.

Teacher Notes: Setup, Safety & Variations
Equipment: 1 play parachute · Optional hand drum or music cue
Setup: Open the parachute fully with the clear perimeter required by the product and planned movement.
Safety: Use the manufacturer-approved grip, walk rather than run, and stop if spacing becomes crowded or the fabric pulls a child off balance.
Make It Easier: Walk slowly in one direction to a steady count.
Make It Harder: After a full stop, change direction and begin again on a new cue.
Teacher Cue: "Walk together, keep your own space, and freeze when you hear stop."
Activity 21-5 archival canopy lift adapted for adult control

Adult-Controlled Canopy Lift Demonstration

Children lift the canopy together while a designated adult maintains control of any manufacturer-approved guide rope or attachment. Children release only on the adult's cue and only when the product instructions permit this activity.

Teacher Notes: Setup, Safety & Variations
Equipment: 1 play parachute; any guide rope or attachment must be part of, or explicitly approved for, the product
Setup: Use an indoor, wind-free clear space away from lights, fans, branches, doors, and other groups, following the product's clearance requirements.
Safety: A trained adult maintains control. Do not add improvised ropes or perform a release if the manufacturer does not authorize it, if there is wind, or if control cannot be maintained.
Make It Easier: Keep everyone holding the parachute and make a small, controlled group lift without releasing.
Make It Harder: Repeat the controlled lift with a slower count while everyone remains in their assigned position.
Teacher Cue: "Lift together, watch the adult, and release only if you hear the release cue."
Activity 21-6: Squirrel Perimeter Relay

Squirrel Perimeter Relay

While classmates remain safely at their parachute positions, one child at a time travels around the clear outside perimeter with a soft relay object and returns to the next teammate.

Teacher Notes: Setup, Safety & Variations
Equipment: 1 play parachute · Soft relay object such as a foam ball
Setup: Maintain a clearly marked outer travel lane with enough clearance around the entire parachute.
Safety: Children at the parachute keep feet, hands, and equipment out of the travel lane. Use walking or jogging based on available space; do not race when the perimeter is crowded.
Make It Easier: Walk a half-lap and hand the object to a teammate at a marked exchange spot.
Make It Harder: Change the travel pattern to marching or side-stepping while keeping a controlled pace.
Teacher Cue: "Stay on the outside path, keep your eyes up, and pass the soft ball at the marker."
Activity 21-7 archival elephant tug adapted to gentle cooperative tension

Elephant Gentle Pull-and-Release

Stand in your assigned position and create gentle outward tension on the parachute, then relax the fabric together when the teacher gives the cue.

Teacher Notes: Setup, Safety & Variations
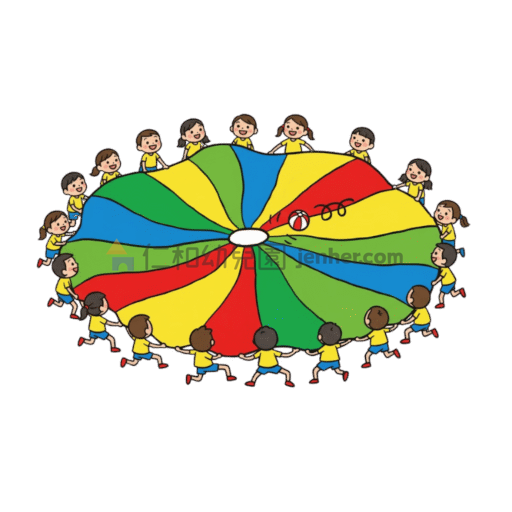
Equipment: 1 play parachute used within manufacturer guidance
Setup: Evenly spaced participants with clear floor behind each child.
Safety: Use only gentle tension and never let go suddenly. Stop immediately if anyone is pulled off balance or the product instructions prohibit pulling games.
Make It Easier: Sit or kneel in stable positions and make very small pull-and-relax movements.
Make It Harder: Alternate between gentle tension and loose ripples on two different drum cues without increasing force.
Teacher Cue: "Gentle elephant pull... and relax. Everyone stays balanced."
Activity 21-8: Flying Fish Ball Roll

Flying Fish Ball Roll

Work together to make small rising and falling movements that guide a lightweight ball around the parachute without chasing it if it rolls off.

Teacher Notes: Setup, Safety & Variations
Equipment: 1 play parachute · 1 lightweight foam playground ball or soft plush object
Setup: Use a clear space that meets the parachute manufacturer's perimeter requirements.
Safety: If the ball rolls off, pause the game before a designated adult or helper retrieves it; children should not leave their positions to chase it.
Make It Easier: Keep the ball near the center with very small ripples.
Make It Harder: Use a slightly larger shared wave while still keeping the ball on the canopy rather than launching it into the air.
Teacher Cue: "Small ocean waves—watch the fish travel and keep it on our parachute."
Activity 21-9 original cat-and-mouse diagram adapted to open-gate walking routes

Cat & Mouse Open-Gate Adaptation

Modern safety adaptation: hold the canopy high and mostly still while one 'mouse' travels through a clearly open gate and one 'cat' follows a separate outside path. Do not chase or tag underneath moving fabric.

Teacher Notes: Setup, Safety & Variations
Equipment: 1 play parachute · Optional role cards or colored vests
Setup: Use only if the manufacturer permits under-canopy play. Keep at least one large edge opening clearly visible and unobstructed.
Safety: No chasing, tagging, or rapid lowering while a child is underneath. An adult supervises the open gate and stops the activity if visibility or clearance is reduced.
Make It Easier: One child walks under the high canopy from one open gate to another while the class holds still.
Make It Harder: A second child follows a separate outside walking route and both arrive at matching color spots without racing.
Teacher Cue: "Mouse uses the open tunnel; cat stays on the outside path. Walk, look, and stop on cue."
Activity 21-10 archival ball-bounce game adapted to gentle parachute popcorn play

Popcorn Ball Bounce

Place a small number of lightweight foam balls on the parachute and use gentle shared ripples to make them bounce while everyone stays in position.

Teacher Notes: Setup, Safety & Variations
Equipment: 1 play parachute · 5–8 medium lightweight foam balls
Setup: Use a clear activity area with the full manufacturer-required perimeter around the group.
Safety: Keep children at their assigned positions and pause before retrieving any ball that leaves the canopy.
Make It Easier: Use 2–3 larger lightweight balls and try to keep them near the center.
Make It Harder: Add one more foam ball while keeping the same controlled ripple size and group spacing.
Teacher Cue: "Tiny popcorn waves—keep your feet in place and watch the balls bounce."
Activity 21-11 original cross-circle switch adapted to one-at-a-time walking under a high canopy

High-Canopy Walk-Through Switch

Modern safety adaptation: lift the canopy high and hold it steady while one child, or one clearly separated pair, walks underneath to an open spot on the opposite side.

Teacher Notes: Setup, Safety & Variations
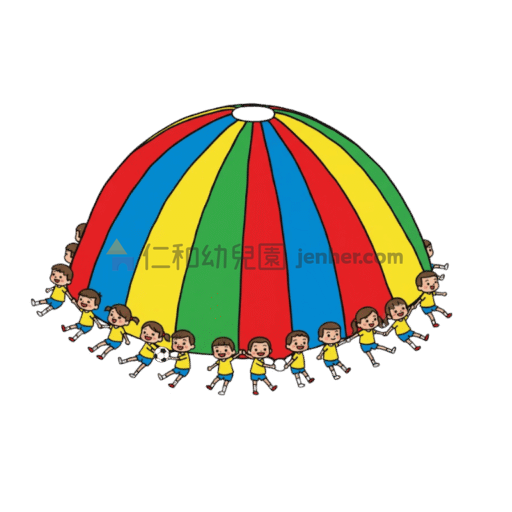
Equipment: 1 play parachute · Optional role cards or color spots
Setup: Use only if the product permits under-canopy movement and there is a clearly visible open destination spot.
Safety: Do not lower the canopy while children are underneath. No pushing, blocking, or racing through the center.
Make It Easier: Call one child at a time to walk to a clearly marked open spot.
Make It Harder: Call two children from widely separated starting positions and have them walk to different open spots without crossing paths.
Teacher Cue: "Canopy stays high—walk to your open spot, then everyone lowers together after the all-clear."
Activity 21-12 original enclosed dome game adapted to an open-exit parachute dome

Open-Dome Secret Ball Guess

Create a high dome with one large edge opening kept fully open. Children who choose to sit near or under the dome listen and guess where a soft sound-making ball is being rolled outside.

Teacher Notes: Setup, Safety & Variations
Equipment: 1 play parachute · 1 soft chime ball or other age-appropriate sound-making ball
Setup: Use only if the parachute manufacturer permits dome play. Keep the group small enough that the opening remains clearly visible and accessible.
Safety: Maintain a large, unobstructed exit opening; never seal the perimeter or require a hesitant child to enter. An adult stays at the opening and can end the dome immediately.
Make It Easier: Keep the canopy high with children remaining outside while they listen for the ball.
Make It Harder: Add simple sound cues such as gentle rain ripples and a chime, without closing the exit or reducing visibility.
Teacher Cue: "Our door stays open. Listen for the secret ball, and step out anytime you want."
Activity 21-13 original escape game adapted to a high-canopy open-gate walk-through

Rabbit Open-Gate Walk-Through

Modern safety adaptation: hold the parachute high and still while a small group of 'rabbits' walks or duck-walks through clearly designated open gates. The canopy is lowered only after everyone is fully outside.

Teacher Notes: Setup, Safety & Variations
Equipment: 1 play parachute · Optional color spots marking open gates
Setup: Use only if under-canopy movement is permitted by the product instructions. Mark 2–3 wide exit gates around the perimeter.
Safety: Do not lower the parachute while anyone is underneath. Children walk or duck-walk rather than scramble, and adults maintain clear exit paths.
Make It Easier: One child at a time walks through the nearest open gate while the canopy remains high.
Make It Harder: Call a color gate and have a small, well-spaced group walk to that exit without racing.
Teacher Cue: "Rabbits find an open gate, walk through, and give a thumbs-up when everyone is outside."
Frequently Asked Questions

Preschool Parachute Play & Teaching FAQ

Practical guidance on parachute sizing, grip safety, indoor-space decisions, child choice, and Head Start ELOF connections.

What is the best parachute size for a preschool class of 15–20 children?
A 16-foot to 20-foot (4.8m–6.0m) parachute is one common option for a group of 15–20, but diameter alone does not determine safe capacity. Check the manufacturer's age range, handle count, maximum participant guidance, and required clear space so every child has a designated position without crowding.
How do you teach preschoolers to hold a play parachute safely?
Follow the grip shown in the specific parachute's instructions. Children should use the designated handles or reinforced edge without wrapping fabric or straps around fingers, wrists, or the body. Because products differ, one grip should not be presented as universal.
Can parachute games be played in small indoor classrooms?
Only when the specific parachute can be fully opened with the manufacturer-required clearance around participants. In compact spaces, choose a smaller product intended for that group size and use low-amplitude seated or standing activities. If walls, furniture, doors, lights, or other children reduce the required clearance, choose a different activity.
Which Head Start Early Learning Framework domains do parachute games support?
Parachute activities can offer practice related to P-PMP 1 and P-PMP 2 through coordinated lifting and shared-space movement, and to P-SE 3 and P-SE 4 through turn-taking and cooperative play. These are alignment opportunities, not guaranteed developmental outcomes. See the official Head Start P-PMP goals and P-SE goals.
How should educators support children who are hesitant to go underneath the canopy?
Do not force a child under the parachute. A hesitant child can remain outside, hold a designated handle or edge position, observe, or choose another role. If the child wants to explore underneath, begin with the edge held high and an obvious open exit so the child can leave immediately.
ADVERTISEMENT

Try Next